A typical dough has circulated and traveled the world for centuries gaining different takes. There’s sweet, lean, herb-infused, flaky, and even a dough you can boil. With the many variations that have been developed, the process of making various types of doughs certainly have evolved as well. Nowadays, you do not even need to knead your dough. You can let your handy stand mixer do it for you!
Kneading dough is vital to form the gluten network which gives bread its structure. Kneading and mixing take a lot of time and effort from a baker, not to mention the mess you will be dealing with after. This is where the stand mixers make their debut. Mix everything in a single bowl, or two, to get the right consistency you desire. What makes using a stand mixer even more appealing is the wide range of attachments it offers. A hook for tougher doughs, a paddle for softer ones, and more!
In this article, we take you for a spin around the types of doughs there are and how a stand mixer will make your life easier. Learn which attachments to use and how to troubleshoot possible problems you may encounter.
Bread doughs
Sourdough
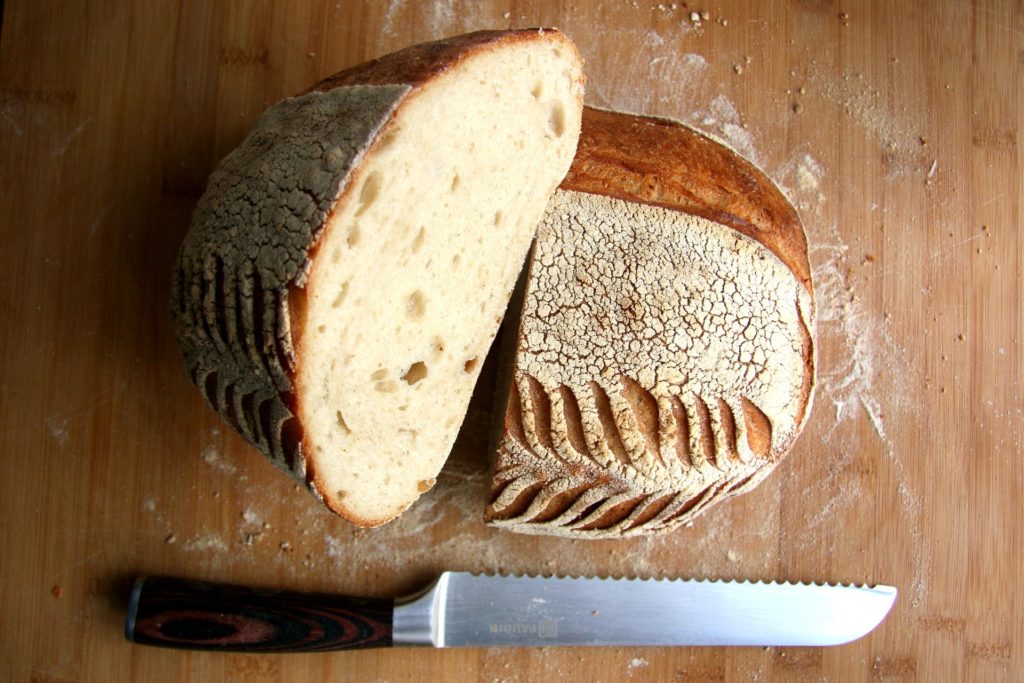
This type of dough is considered a leavened bread. In fact, it is considered the oldest form of bread made with a culture of microorganisms. What makes the dough for this bread unique is the use of a premade culture used to slowly aerate the dough and form its unique flavors. For this type of bread, the recipe for the culture is what is usually handed down from generation to generation.
Sourdough bread is popular for its crispy crust, chewy insides, and bold and nutty flavors. Because this type of dough uses a live culture, it means that the dough uses more moisture than a regular bread dough. Imagine mixing all those ingredients by hand and getting all sticky just by making the starter dough. Luckily, using a stand mixer eases the whole process out. The hook attachment for your standard mixer is designed to mix the wet ingredients for you and develop the gluten in the dough by pushing the mixture to the sides. Aside from taking out the hassle of making a dough, a stand mixer allows for efficient gluten formation which is the key for a sourdough bread with a great and open crumb.
Here is a basic recipe for a sourdough using a stand mixer from foodgeek.dk.
Ingredients
- 576 g bread flour
- 144 g whole grain rye flour
- 522 g water, divided room temperature
- 144 g starter
- 14 g salt
*Note that this recipe encourages you to use the lower limit of 70% hydration on your dough and work your way up to 75% if the dough does not feel right.
Instructions
1. Sift and mix all the dry ingredients inside the stand mixer’s bowl. You can mix the dry ingredients manually or use the paddle attachment at slow speed.
2. While mixing the dry ingredients, gradually add the starter culture into the dry ingredients including the water.
3. Once the dough has come together, switch the paddle attachment to hook or “C” attachment to knead the dough.
4. Mix the dough at medium speed or at least speed 3 for most stand mixers for around 5 minutes.
5. Once the dough starts to not stick too much to the bowl, perform a windowpane test.
What could go wrong and how do you fix it?
The dough is too dry
As soon as you add the starter into the dry ingredients, the dough should be very sticky but not too runny as if it were a batter. A dry dough would look stiff and could cause further problems such as uneven mixing and improper hydration of the dough, leading to a tough bread. Troubleshoot this by increasing the moisture content of the dough by adding 5% more to what the recipe needs.
The dough breaks during the windowpane test
This test calls for you to hold a portion of the dough between your thumb and two fingers and gently stretch it. The dough should not break and hold its structure forming thin windowpane-like thinness. If the dough breaks, it means that the gluten in the dough has not yet adequately developed to hold its structure. If your dough fails this test, return it to the mixer and knead it using the same speed as before for two more minutes.
I do not have a hook attachment
This may be the biggest downside to using a stand mixer. A hook attachment is vital in making sticky dough. A paddle attachment will not be able to withstand the resistance of the dough once the gluten starts to form. If this is the case, knead the dough by hand after the initial mixing stages.
Rich dough (cinnamon rolls, dinner rolls, and milk buns)
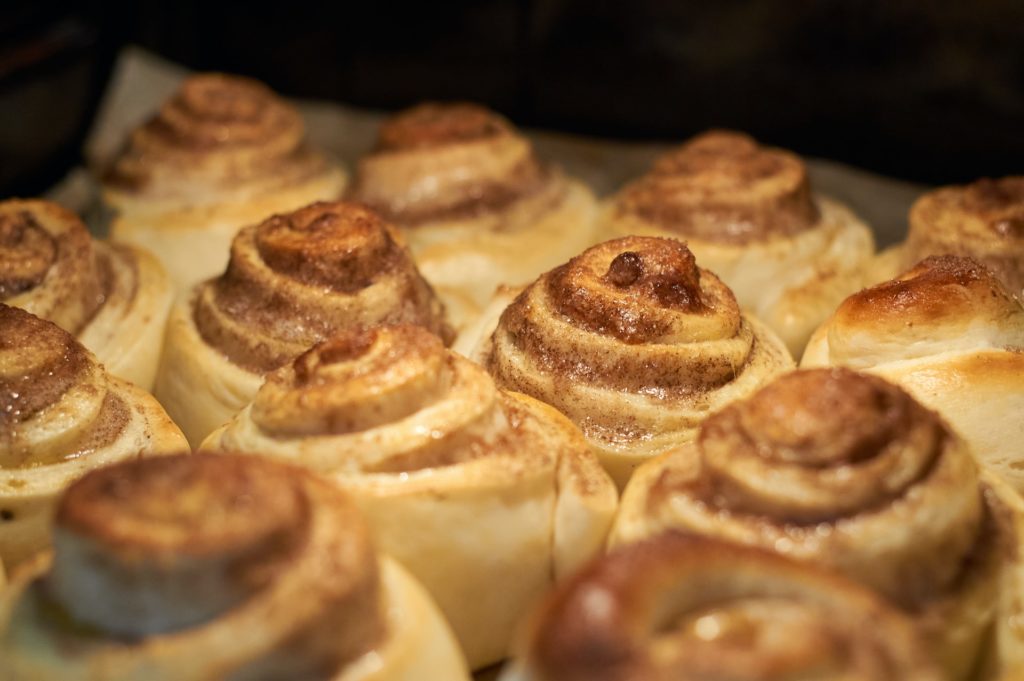
The perfect dough to use for a cinnamon roll. Imagine the cake-like texture of a sweet yet tender roll. The key to achieving this is making rich dough. By definition, this dough contains a certain amount of fat, butter, or cream with eggs in its recipe. The tender texture of this dough is a result of the shortening effect of fats on the gluten strands of the dough restricting it from stretching too much. Rich doughs are yeast-based, which means that they need to be proofed after kneading.
Another example of a rich dough is a brioche which has a very high concentration of eggs and butter. Because this dough has more fats, expect it to be stickier and softer than a usual dough. Kneading and proofing for a rich dough require a longer time because of the gluten-inhibiting ingredients. Save your arms from the possible strain of trying to make sweet rolls for the first time and use a stand mixer fitted with a dough hook. With this attachment, expect to be kneading longer. The first sign that your dough is just the right texture and very close to being kneaded correctly is when the dough starts to cling to the hook and resist. Rich doughs tend to make a more uniform crumb for a more tender texture. It usually takes around 6 minutes to fully develop the gluten of this dough with a mixer. By hand, this kneading can be doubled depending on the technique enforced on the dough. In addition, the dough is quite sticky and hard to handle. Adding flour to the table to avoid sticking can alter the end texture of your product.
Here’s a recipe for you to get started with making rich dough. Head to bakerbettie.com for the complete recipe!
Ingredients
- 1 cup (8 fl oz, 237 ml) whole milk (lower fat milk can be substituted)
- 1 package (0.25 oz, 7 gr, or 2 1/2 tsp) active dry or quick rise yeast
- 1/4 cup (1.75 oz, 49 gr) granulated sugar
- 1/3 cup (5 1/2 TBSP, 2.6oz, 73gr) unsalted butter, melted and cooled
- 2 large eggs, room temperature
- 1 1/4 tsp (6 gr) Morton kosher salt or table salt (use 2 1/2 tsp if using Diamond kosher)
- 4 cups (17oz, 476gr) all-purpose flour
Instructions
- After hydrating the yeast and while waiting for it to bloom, combine the fat and sugar using a rubber spatula. Alternatively, you can use a whisk attachment to incorporate both ingredients together well.
- At low speed, add in the eggs one at a time until all eggs are incorporated.
- Add in the milk/yeast mixture while still on low speed.
- Slowly add the flour to the bowl. Once all of the flour has been added and partially mixed, change your attachment into a hook.
- The dough is expected to be very sticky. Knead the dough at medium speed for around 5 to 6 minutes until the dough starts to cling to the hook and no more residues are left on the walls of your mixing bowl.
- Perform a windowpane test on your dough.
- Once done, ferment the dough for at least 30 minutes in an oiled bowl, covered with plastic wrap.
What could go wrong and how do you fix it?
The dough is not incorporated well.
This problem usually happens when some of the more hydrated dough clings to the bowl and does not stick to the majority. To troubleshoot this, stop the mixer and scrape the sides using a spatula or a rubber scraper. Continue kneading until the residues have been incorporated.
The dough is too tough
There are two possible reasons for this problem; one of which is you added too much flour to the dough in fear of it being too sticky. Remember to only gradually add flour if you think that the dough is too hydrated. If you added too much flour, the dough will be hard, as well as the resulting bread. To resolve this, gradually add water into the dough as you mix it.
The more troublesome reason is over kneading. Over kneading breaks the gluten strands of the dough and makes it very tough. Allow the dough to rest twice as long as how you would normally do. This means that proofing will also take longer. As the gluten relaxes, the dough will be more manageable.
Lean dough (pizza dough and baguette)
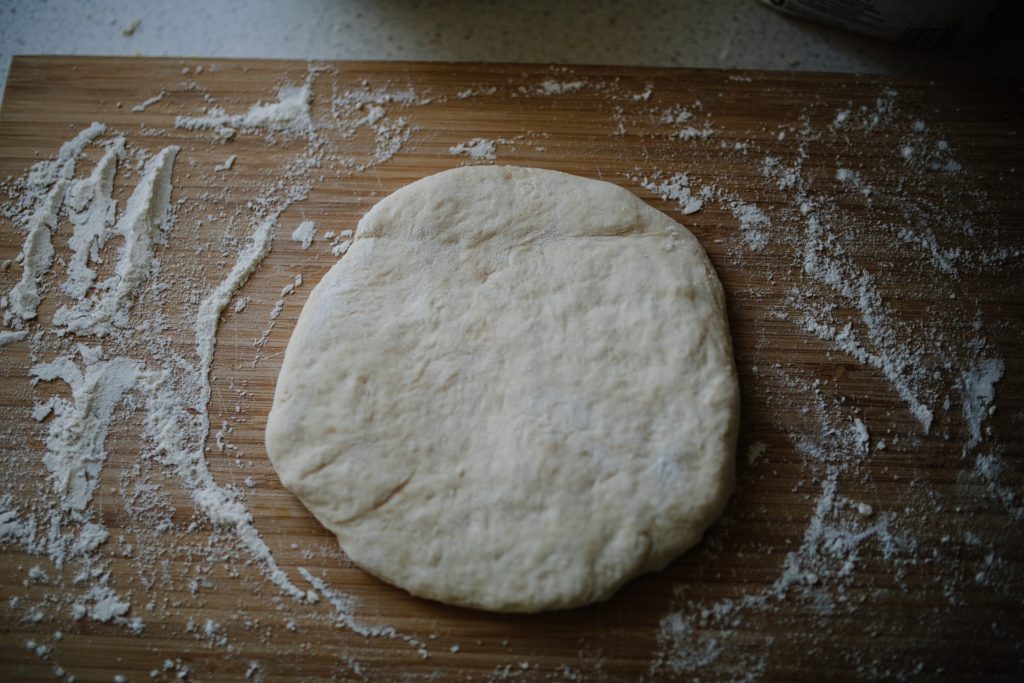
Time to learn what type of dough your favorite dinner is; and by that, we mean pizza. This world-famous meal is a type of lean dough that uses very small amounts of sugar and fat. This makes for a crispy crust such as what you get on a pizza and other French and Italian bread. Lean doughs typically only need 4 basic ingredients: flour, salt, water, and yeast. Because of a tougher consistency, most doughs in this category need to be rested in between kneading, but only requires a few strokes. Because the flour content is high, lean doughs form an extensive gluten network quite fast.
Lean doughs have smaller air packets and a tighter crumb than rich dough. In addition, this type of dough tends to use longer proofing time. With very few flavor-adding ingredients, lean doughs need to develop flavors longer with the help of less yeast. Not only does this type of dough have very few ingredients, but there are also a few recipes that do not even call for prolonged kneading.
Try your hands on making a basic lean dough with this recipe from fueldom.com.
Ingredients
- 2.27 kg Bread flour
- 20 g Instant Dry yeast
- 1.53 kg Water
- 1 3/4 oz Salt
Instructions
- Add the water into your mixing bowl followed by your pack of instant yeast.
- Gradually add flour while your mixer is on slow mode using a hook attachment.
- Incorporate all the flour and salt and mix on medium speed for 2 minutes.
- Knead the dough to the improved stage of gluten. At this point, the dough must be smooth and elastic.
* Read the whole recipe up to fermentation and shaping at fuledom’s website!
What could go wrong and how do you fix it?
My dough keeps shrinking and I cannot shape it.The dough is not incorporated well.
This is often caused by a gluten network that has been formed too extensively which may have resulted from too much flour or over kneading. Allow the dough to rest longer at room temperature to let the gluten network to relax.This problem usually happens when some of the more hydrated dough clings to the bowl and does not stick to the majority. To troubleshoot this, stop the mixer and scrape the sides using a spatula or a rubber scraper. Continue kneading until the residues have been incorporated.
My pizza dough became bread-like.The dough is too tough
This problem means that the resulting crust is fine which indicates over kneading. A lean dough is typically kneaded for around 4 to 6 minutes only.There are two possible reasons for this problem; one of which is you added too much flour to the dough in fear of it being too sticky. Remember to only gradually add flour if you think that the dough is too hydrated. If you added too much flour, the dough will be hard, as well as the resulting bread. To resolve this, gradually add water into the dough as you mix it.
I think my lean dough is too soft.
There may be three reasons for this. One is that the dough has not fully developed yet, which means it needs to be kneaded more. The other is that there is too much moisture in the dough which calls for more flour. Lastly, check the type of flour you used. A soft dough is usually a result of the lack of protein content inside your flour. This protein is what makes the gluten strands.The more troublesome reason is over kneading. Over kneading breaks the gluten strands of the dough and makes it very tough. Allow the dough to rest twice as long as how you would normally do. This means that proofing will also take longer. As the gluten relaxes, the dough will be more manageable.
Flatbread (pita and tortilla)
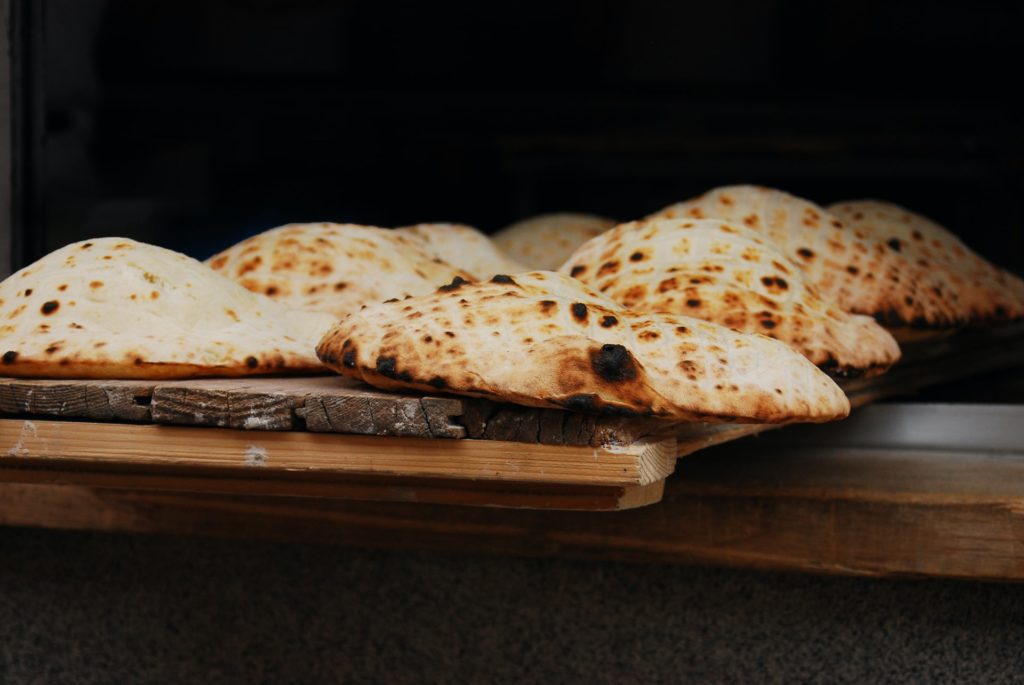
The dough used to make flatbreads is usually unleavened and gets its name from its characteristically thin appearance. Although some are minimally leavened with baking powder or soda. Most recipes for making a flatbread are usually very straightforward. Just add flour, water, and salt. It does not even need that much kneading! These bread were designed to be easily eaten without much preparation but most often paired with a bigger dish. Perhaps one of the most famous flatbread aside from the leavened pizza is the tortilla. Often paired with fillings to create a wonderful nacho dish.
In mixers, flatbreads are usually tough as they do not have many conditioners nor additional liquid. In addition, some flatbreads use other flour that is harder to hydrate such as cornflour. Below is a super easy and basic flatbread dough recipe you can try from kitchenaid.co.uk.
Ingredients
- 150 g all-purpose flour
- 1/4 teaspoon salt
- 25 g butter
- 92,5 ml whole milk
- 1/2 tablespoon oil
Instructions
- Place milk and butter in a pan and heat until the butter is just melted.
- Pour the mixture into your stand mixer bowl.
- Add flour and salt.
- Knead the mixture with a dough hook at speed 4 for about 3 minutes or until the dough is smooth.
- Wrap the dough in cling wrap and rest the dough for 30 minutes.
- Cut the dough on top of a floured surface into desired weight.
- Roll out each portion to the desired thickness.
What could go wrong and how do you fix it?
My dough is too tough or soft.
If your dough is too hard to manage, it may be because you added too much flour into the mixture. Solve this by gradually adding water into the dough and kneading it again. Conversely, a flatbread dough should not be too sticky and the end product must be smooth. A sticky dough indicates too much water which calls for the gradual addition of flour.
The dough is breaking when sheeted or rolled out.
Breaking is usually a sign that the dough is not well hydrated, hindering the formation of gluten strands. Try adding a spoon of water and kneading the dough until you get the right consistency you desire.
Pastry doughs
Puff dough (croissant and Danish pastry)
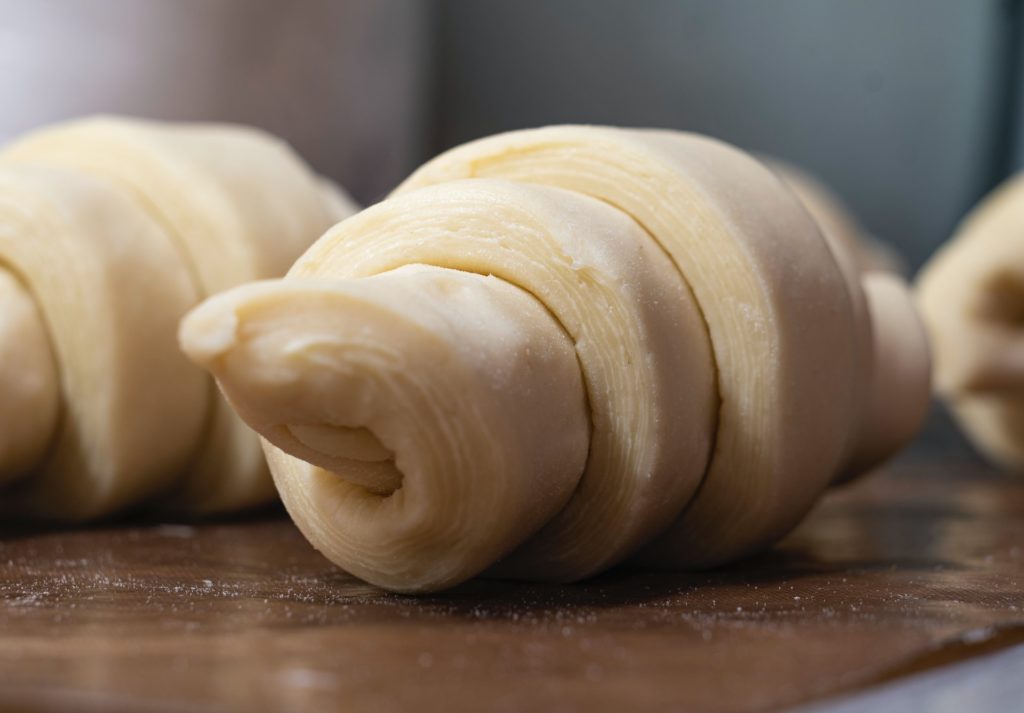
Here is a type of dough for the advance-leveled bakers. If you prefer making your dough from scratch instead of buying ready-made ones from grocery stores, gear up for a puff pastry dough. The reason why we mentioned that making the dough food this product is for advanced level is because it is very laborious and time consuming. A puff pastry is named after its characteristic airy final product that bloats inside the oven and produces a stack of multiple layers. Making a puff pastry entails several folding and rolling. In between the folded dough, butter is folded to create distinctive layers of dough that fill puff when baked.
Making the layers is laborious, but the dough itself can also be quite a challenge. Although it has to be tender, the dough must have a strong enough gluten network to hold its shape when it puffs. That means a lot of kneading is needed! The first thing to learn when making it is how the dough should look like before folding. Knowing this step will tell you if the dough can handle all the rolling you will be doing.
Get started with this quick puff pastry recipe from bakerbettie.com.
Ingredients
- 1 lb 4 oz (570 gr, 4 1/2 cups + 2 1/2 TBSP) all-purpose flour
- 1 lb 4 oz (570 gr, 2 1/4 cups, 5 sticks) cold unsalted butter, cut into about 1 inch pieces.
- 1 1/2 tsp (7.5 gr, 0.3 oz) Morton kosher salt
- 6 fl oz (180 ml, 3/4 cup) very cold water
Instructions
- In a mixer fitted with a dough hook, place the flour inside the bowl.
- Run the mixer at low speed and add the cold butter cut into an inch and allow them to be incorporated into the flour. At this point, the flour should look coarse.
- Add the salt and water into the dough and mix at low speed.
- Stop mixing once you see the dough to come together or when it is just enough to handle.
- Form the dough into a flattened square, wrap it in a plastic wrap and let it rest inside the refrigerator for about 10 minutes
- Roll the dough out into a rectangle and fold ⅓ of the dough toward the center. Do this for the other ends of the dough and repeat this step two more times.
- This time, fold ¼ of the dough toward the center from the two ends of the rectangle and finally fold the dough in half.
*Note that this recipe is used to make quick puff pastry which is slightly different form a traditional puff pastry. No butter is placed in between folds and folding does not require resting time. Head to bakerbettie.com for the full recipe and guide!
What could go wrong and how do you fix it?
My dough is shrinking
This reaction is caused by the extensive gluten network in your dough. Fix it by allowing the dough to rest in the refrigerator for 10 minutes. This also helps the butter regain its solid-state for ease of handling.
I don’t see the layers
If your butter becomes warm and dissolves, rolling the dough will incorporate the butter into it. This will remove the layers of the dough and will not make the dough puff. Make sure that the butter is cold. Usually, this is also the reason why bakers rest their dough after folding.
My dough is breaking apart
If you undermix your dough, this means that the gluten has not formed well. This is the main reason for your dough easily breaking apart. Knead the dough until it can be formed into a sheet without tearing.
Flaky dough (pasties, turnovers, and sausage rolls)
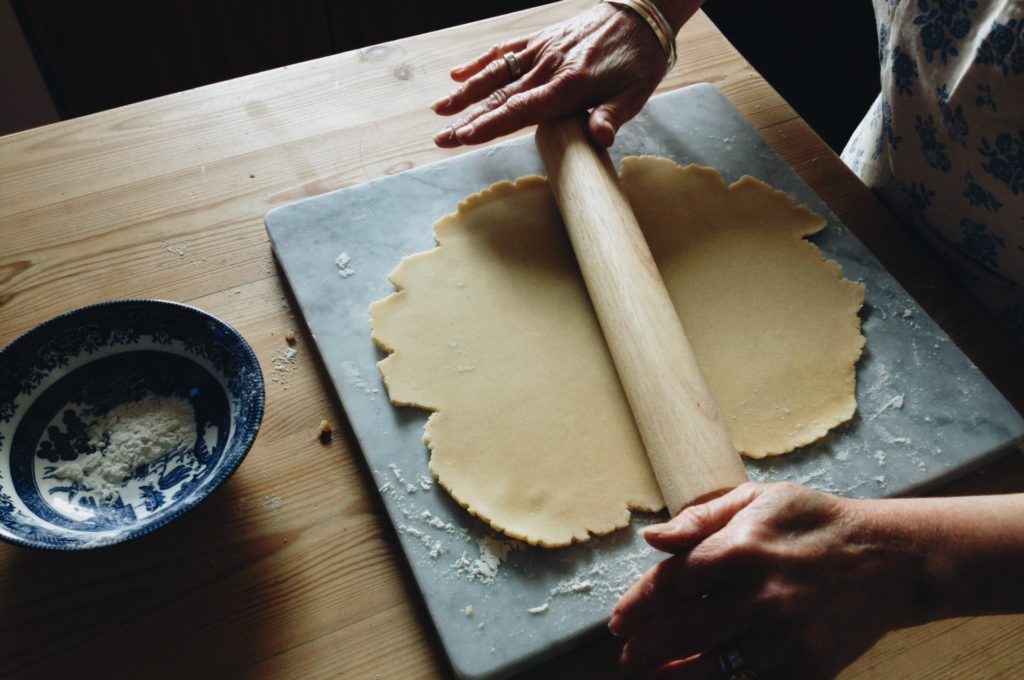
Often used interchangeably with Puff pastry, this dough has its own quirks and appeal. Flaky pastry, well, is flaky. No need to elaborate that. What makes it different from a puff pastry is its shorter preparation time and even flakier texture. Their difference lies in the size of butters or lard being used. The fat components used in a flaky pastry are in lumps, creating a discontinued layer along the sheets. Similarly, lumps of butter are laminated between the dough. A flaky pastry has less folds yet has a flakier texture and does not get enough rise.
Unlike puff pastry, a flaky pastry is often used for lighter fillings. It is not often used as a pie crust or for a wellington. This pastry is lighter and can stand alone or with a simple dusting of sugar. Making a pastry dough with a mixer allows you to evenly distribute the butter into the flour. You do not need to use a pastry cutter anymore to do this job, that just adds more to the things you need to clean after.
Let cuisinart.com teach you how to make a basic flaky recipe.
Ingredients
- 1½ cups unbleached, all-purpose flour
- ¼ teaspoon salt
- 1⁄8 teaspoon baking powder
- 8 tablespoons unsalted butter, cut into ¼-inch bits, well chilled
- 1 tablespoon non-hydrogenated vegetable shortening, cut into ¼-inch bits, well chilled
- 2 to 4 tablespoons ice water
Instructions
- Place all the dry ingredients in the mixing bowl.
- Using the flat paddle on speed 1, drop half of the required butter and all the shortening into the mixture. Continue mixing for 45 seconds.
- Add the remaining butter and mix for about 45 to 60 seconds or until the mixture forms crumbs with butter at pea-sized bits, stopping until the mixture forms a ball.
- Gather the mixture and form into a disc and chill for at least an hour to relax the gluten.
Note: This recipe can be refrigerated for up to 3 days for make-ahead pastry dough of frozen for up to a month. In addition, you may need some extra steps to make the layers of your flaky dough.
What could go wrong and how do you fix it?
My dough is not flaky at all
When making pastry dough, your working condition must always be cool. This goes as well with only using cold butter or lard. Another problem is you might have mixed in the butter too much and have incorporated it into the dough. Ensure that there is still a bit of butter seen on the mixture.
Shortcrust dough (pie crust and filled tarts)
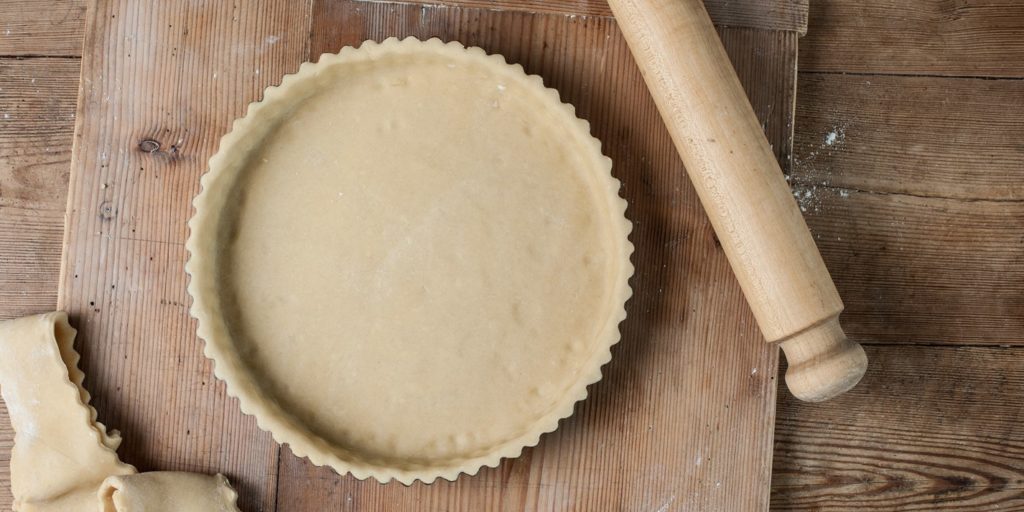
If you enjoy eating flaky pies, here is the perfect dough type for you. Although puff pastry can be used for pies, it does not produce the stronger structure to hold moist fillings and lose its characteristic texture. There are several types of shortcrusts, two of which are Pâte Sucrée and Pâte sablée. The former is a pie crust that uses egg as a binder which produces a crumbly texture, whereas the latter has a higher percentage of sugar and uses the creaming technique with butter. Shortcrust is called as such because it falls apart when baked to perfection into short pieces.
A shortcrust has a lot of fat content and sugar. Proportion-wise, a lot of things could go wrong when making a shortcrust. Mixing in the ingredients evenly is one problem, the next is improper ratio of dry to wet ingredients. Aside from adding butter, this dough calls for more water compared to the other pastry doughs. It needs to hold a certain extent of elasticity. What makes this recipe better mixed in a stand mixer is that your machine can easily break the ice-cold butter that you need to use. The temperature of the butter is crucial for this recipe.
Do not worry about the technical stuff, learn how to make a great shortcrust dough from kingarthurbaking.com.
Ingredients
- 2 1/2 cups all-purpose flour
- 1 ¼ tsp salt
- ¼ cup vegetable shortening
- 10 tbsp ice-cold butter (cubed)
- 10 tbsp ice-cold water
Instructions
- Combine flour, salt, and shortening using the beater attachment at speed 2 until the mixture forms crumbs.
- Add the butter into the mixture and beat at speed 2 to achieve an uneven crumb. You want a few chunks of butter to remain unmixed.
- Add the cold water gradually and mix at low speed.
What could go wrong and how do you fix it?
My pie has raw flour
Due to inadequate mixing, some of your flour may remain unhydrated and can form lumps which can hinder baking. Ensure that you will stick to how the ingredients are incorporated.
My pie turned out to be chewy
During mixing, gluten networks form as a result of partial kneading. For a shortcrust to remain “short”, therefore crumbly, the gluten strands need to be coated in shortening or oil. Make sure to mix in the oil to coat all the flour before adding in water into the mixture.
The dough does not hold together. Is crumbly dough good?
We mentioned before that your dough needs to hold its shape to an extent. A crumbly dough will fall apart before you even try to form it into a mold. Add in spoons of cold water until you achieve a manageable dough.
Choux dough (eclairs and cream puffs)
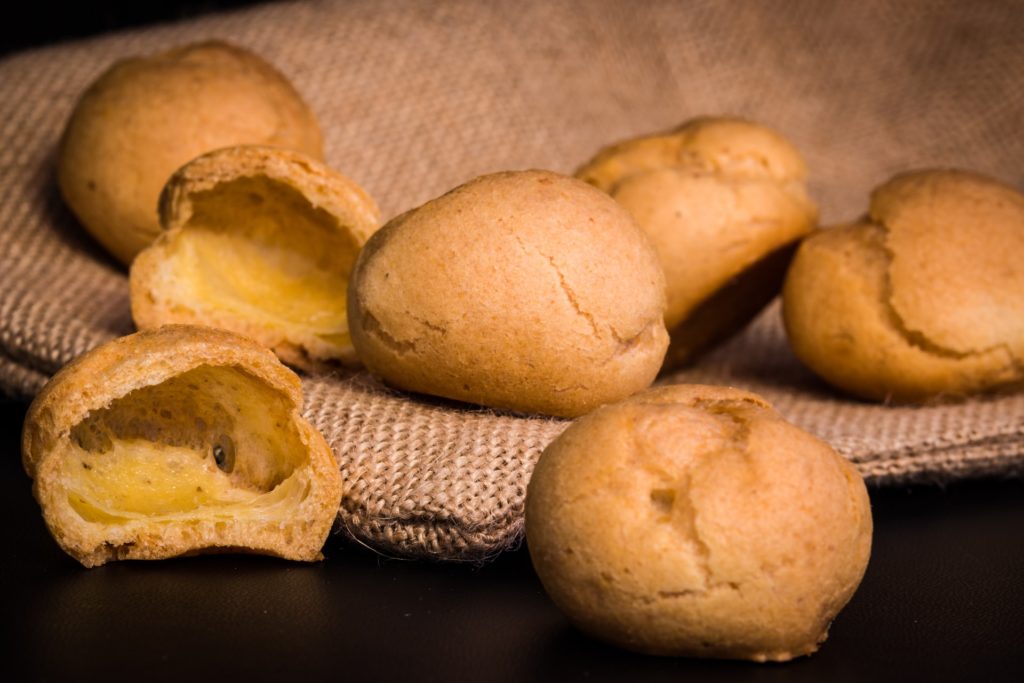
Yet another recipe for the advanced bakers is the choux pastry or otherwise known as pâte à choux. Although this recipe is very straightforward, a lot could go wrong. The dough contains very high moisture which is crucial to give the pastry its rise. Without any leavening agent, this dough will only use the steam from the dough to raise it. Choux is often used for pastries with fillings such as eclairs which are long choux pastries filled with pastry cream.
We know we mentioned the recipe being straightforward, we meant the ingredients. Making a choux pastry requires multiple steps, one which includes a pan and heating. In addition to the dough being quite hard to handle, a stand mixer will work best to mix the very hot paste and turn it into a sough.
Learn how to make choux pastry from a professional at sallysbakingaddiction.com.
Ingredients
- 1/2 cup (115g; 8 Tbsp) unsalted butter, cut into 8 pieces
- 1/2 cup (120ml) water
- 1/2 cup (120ml) 2% or whole milk
- 1/4 teaspoon salt
- 2 teaspoons granulated sugar
- 1 cup (125g) all-purpose flour (spoon & leveled)
- 4 large eggs, beaten
- egg wash: 1 egg beaten with 1 Tablespoon milk or water
Instructions
- Combine butter, milk, salt, and granulated sugar in a saucepan and bring the mixture to simmer.
- Reduce the heat to low and add flour until completely incorporated and thick dough clumps resembling a mash form.
- Remove from the heat and transfer the mash into the bowl of your stand mixer fitted with a paddle attachment.
- Slowly add the eggs one at a time while the mixer is running at low speed. The mixture will slowly combine so do not be startled if it does not homogenize at once.
*Note: the final texture of the dough must be thick, shiny, and smooth. It must hold its shape when piped.
What could go wrong and how do you fix it?
My choux pastry did not rise
As mentioned, the pastry dough must contain enough moisture to “puff” the dough up. This may mean that there is not enough water in the dough. Alternatively, the dough must be baked at a very high temperature to harden the crust as fast as possible. Opening the oven before the pastry rises is also a sure reason why they collapse.
My dough is soggy
If your dough cannot hold its shape when piped, it may only mean that there is too much moisture which can come from the eggs or water. If the problem is from the butter, chilling the mixture will solve the problem right away.
If this is because of adding too much water, never add flour. The best solution to this is to make another batch at half quantity without any eggs. Gradually mix in the new batch into the runny dough until the consistency is corrected.
Biscuit doughs
Hard dough (galettes and semi-sweet biscuit)
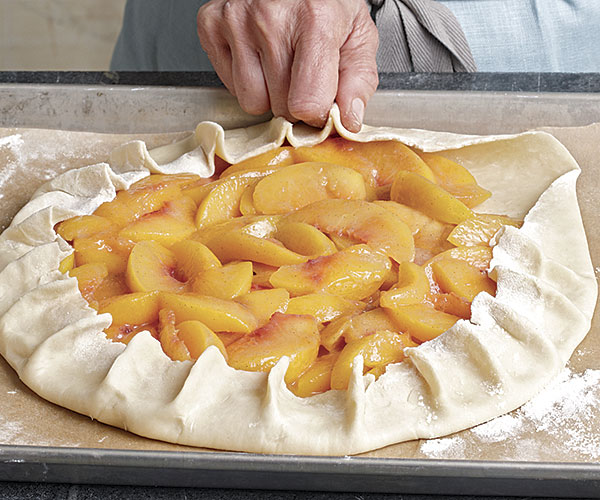
This type of dough is termed as such because of the well-developed gluten network within the dough. This means that mixing time for such doughs is long. Get your arms ready if you do not want to use a mixer. Hard doughs are referred to as “developed” dough referring to the mechanical work needed to make it. In addition to flour, hard doughs contain minimal fat, sugar, water, and occasionally some leavening agent.
To make a biscuit out of a hard dough, it must not be too elastic as the dough shrinks after sheeting. This is why we add sugar and fat. Some recipes for making hard dough only require a single mixing stage which is also called “all in” mixing, whereas some require two stages. For the latter mixing requires the mixing of all ingredients except the flour to form a cream. The flour is added afterwards to create the dough and will be rested to hydrate. Although the recipes are pretty much simple, it is the arduous process of mixing that’ll be challenging.
Try your hands on a galette dough recipe from 196flavors.com.
Ingredients
- 10 cups flour
- 1 cup vegetable oil
- 1 teaspoon sugar
- 2½ teaspoons salt
- 2 tablespoons active dry yeast
- 1½ teaspoon aniseed
- 4 tablespoons golden sesame seeds
- About 2 cups of warm water
Instructions
- Combine all the dry ingredients in the bowl of your stand mixer and make a well at the center.
- Pour the oil into well.
- At low speed, using a paddle attachment, slowly incorporate the water into the dough.
- Using a dough hook, mix the dough until it pulls away from the sides of the bowl.
- Incorporate the salt and increase the speed of the mixer. Knead the dough for approximately 5 minutes
- Cover the dough and allow it to rise.
- In your stand mixer bowl, knead the dough once more for 2 minutes.
- Cut the dough and laminate in a pasta roller to about 3 mm.
*Note: Do not pour all the water into the dough at once. The amount of water you need varies depending on the type of flour you use. Read the rest of the recipe on how to assemble the galettes at 196flavors.com!
What could go wrong and how do you fix it?
I cannot laminate my dough, it’s too hard
Kneading your dough creates the gluten network which makes your dough very tough. Unless this is a case of too little moisture, allow your dough to rest for at least 10 minutes before sheeting. This will relax the dough to facilitate the process.
The dough is too soft
To know that the has been worked perfectly, it must be smooth, springy, and malleable. A wet dough will be too flexible and will most likely produce a soft biscuit. Gradually add the water to see how your dough reacts.
Short dough (shortbread biscuits, rotary biscuits, and wire cut biscuits)
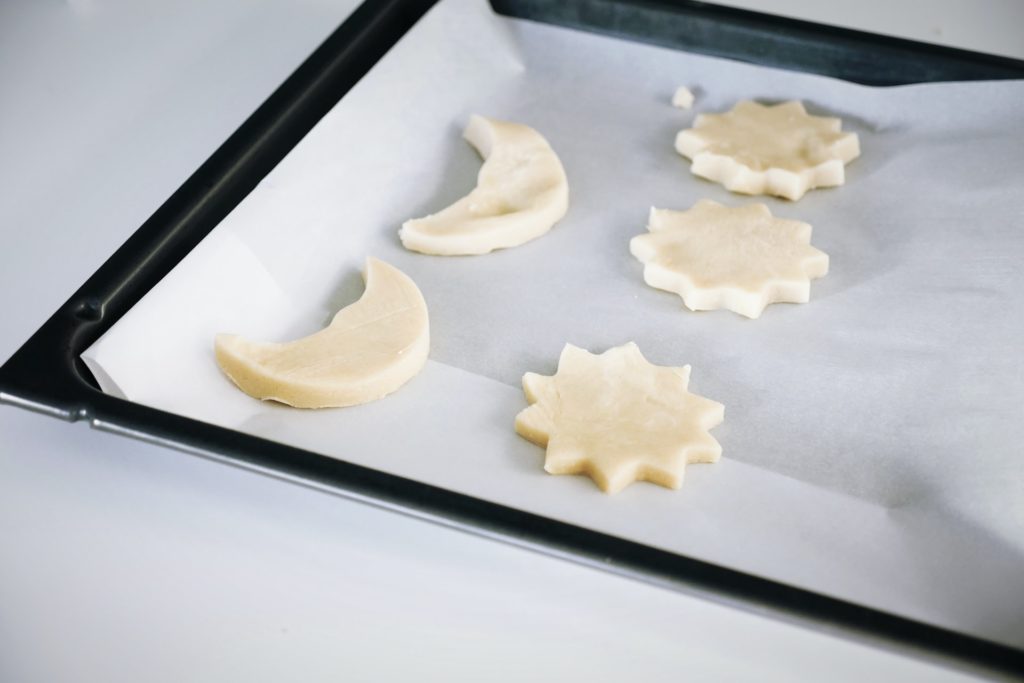
Contrary to hard dough biscuits, short dough contains more fat or shortening and its process is lighter to prevent the gluten from forming. The is supposed to be crumbly and must pull apart easily. In making a short dough for biscuits, the process must be methodical in such a way that the fat and water are incorporated without forming the gluten. This is often achieved by adding both ingredients as an emulsion into the dry ingredients. The undissolved sugar crystals will then play a part in the texture of the final biscuits.
In addition to this technique, short dough typically uses flour with very low protein content, usually around 9.5%. The dough must be cohesive enough that they come together when pressed but must crumble easily. The texture of the dough has been compared to wet and crumbly sand. Using a stand mixer can ensure the gradual incorporation of the emulsion into the dry ingredients without forming the gluten. Set the mixer at low speed. You can even use the whisk so no dough will be pressed against the walls of the bowl.
Wow everyone with your skills when you master making short dough cookies. Start your journey by making Empire biscuits as mentioned by christinascucina.com.
Ingredients
- 227 g (2 sticks) butter
- 85 g (1/3 c) sugar
- 1 egg
- 454 g (3 cups) all-purpose flour
Instructions
- Lightly mix the butter and sugar together using a whisk attachment at low speed.
- While on low speed add the eggs into the mixture until incorporated.
- Gradually add the flour until the consistency is crumbly.
- Roll out the dough to bind together and cut using round cookie cutters.
*Note: The ingredients on this list only include what is needed for the dough. Please visit christinacucina.com for the complete recipe!
What could go wrong and how do you fix it?
My biscuits are floury
Although your dough must be crumbly. Uneven mixing and hydration will cause the biscuits to be uncooked in some parts. Allow the flour and other dry ingredients to hydrate before forming them into a sheet.
The dough has formed a cohesive ball
Not only do short doughs need a lot of fat to inhibit gluten formation, but they also tend to use small amounts of water. The quantity of water you will add will also depend on the protein content of the flour you use. The lower the protein content, the easier it is to hydrate the flour, meaning less water is needed.
Short dough (shortbread biscuits, rotary biscuits, and wire cut biscuits)
Contrary to hard dough biscuits, short dough contains more fat or shortening and its process is lighter to prevent the gluten from forming. The is supposed to be crumbly and must pull apart easily. In making a short dough for biscuits, the process must be methodical in such a way that the fat and water are incorporated without forming the gluten. This is often achieved by adding both ingredients as an emulsion into the dry ingredients. The undissolved sugar crystals will then play a part in the texture of the final biscuits.
In addition to this technique, short dough typically uses flour with very low protein content, usually around 9.5%. The dough must be cohesive enough that they come together when pressed but must crumble easily. The texture of the dough has been compared to wet and crumbly sand. Using a stand mixer can ensure the gradual incorporation of the emulsion into the dry ingredients without forming the gluten. Set the mixer at low speed. You can even use the whisk so no dough will be pressed against the walls of the bowl.
Wow everyone with your skills when you master making short dough cookies. Start your journey by making Empire biscuits as mentioned by christinascucina.com.

Ingredients
- 227 g (2 sticks) butter
- 85 g (1/3 c) sugar
- 1 egg
- 454 g (3 cups) all-purpose flour
Instructions
- Lightly mix the butter and sugar together using a whisk attachment at low speed.
- While on low speed add the eggs into the mixture until incorporated.
- Gradually add the flour until the consistency is crumbly.
- Roll out the dough to bind together and cut using round cookie cutters.
*Note: The ingredients on this list only include what is needed for the dough. Please visit christinacucina.com for the complete recipe!
What could go wrong and how do you fix it?
My biscuits are floury
Although your dough must be crumbly. Uneven mixing and hydration will cause the biscuits to be uncooked in some parts. Allow the flour and other dry ingredients to hydrate before forming them into a sheet.
The dough has formed a cohesive ball
Not only do short doughs need a lot of fat to inhibit gluten formation, but they also tend to use small amounts of water. The quantity of water you will add will also depend on the protein content of the flour you use. The lower the protein content, the easier it is to hydrate the flour, meaning less water is needed.
